
Quick Summary: Folding custom cardboard boxes the right way keeps your products safe and looks nice. Just follow these easy steps: get your workspace ready, open the box, tape the bottom and top flaps, and add fun stickers for a great look!
Folding custom cardboard boxes may appear simple, yet many people struggle with it. Folding a box correctly is essential for protecting your items and making a nice impression. In this article, we’ll teach you how to properly fold your custom boxes. Knowing how to fold boxes can help you save time and effort while moving products or organizing your storage.
Why Folding A Custom Cardboard Box Important?
Folding a personalized cardboard box is necessary for a variety of reasons. First, it protects your items throughout shipment and storage. A properly folded box protects things from harm. Second, it saves space since flat boxes are easier to store. Finally, utilizing cardboard boxes benefits the environment since they can be recycled. By folding boxes correctly, you can ensure that your items look fantastic and arrive in immaculate shape, leaving a pleasant impression on buyers.
Step-by-Step Instructions for Folding Custom Cardboard Boxes
Step 1: Prepare Your Workspace
Before you begin, select a clean, level location to work. A table or a clean floor works great. This will allow you to simply fold the box without making a mess.
Make sure you’ve got everything you need. You’ll need:
- A custom cardboard box
- Tape (clear tape works best)
- Scissors (if needed)
- A ruler (optional, for measuring)
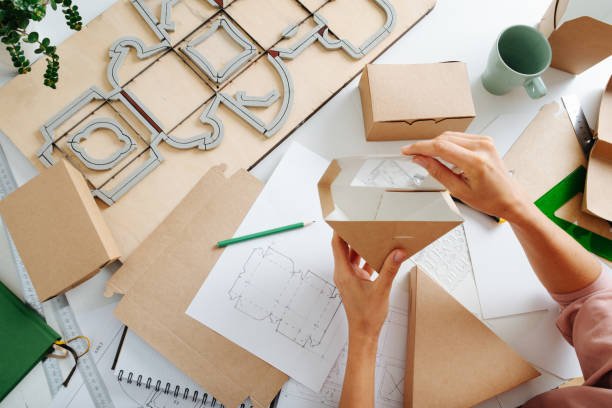
Step 2: Unfold Your Box
Now it’s time to open your package! Carefully unfold it until it resembles a rectangle. Make sure the side with any graphics or trademarks is facing downward. You want the simple side on top.
Step 3: Fold the Bottom Flaps
Begin by folding down the two smaller flaps at the bottom of the box. These are often on the sides. Firmly press them down.
Next, fold the bigger flaps over the smaller ones. Make sure they fit together well. This will help your box remain robust.
Step 4: Secure the Bottom with Tape
Once all of the bottom flaps have been folded, tape them down. Begin at the middle of the flaps and work outward. This helps keep everything together firmly. Make sure you use enough tape to keep everything in place!
Step 5: Flip Your Box
Now that the bottom is secure, flip the box over and fill it with your stuff. The taped component should be at the bottom.
Step 6: Close and Tape the Top Flaps
To shut your box, fold down the little flaps first, like you did at the bottom. Then, fold down the bigger flaps on top of them. Tape these top flaps in place, starting in the middle and going outward. This protects everything within.
Step 7: Add Personal Touches
Consider putting stickers or labels on the top of your box to make it stand out. This gives a personal touch and makes your business stand out. It also helps your consumers feel valued when they receive their shipment.
Assembling Custom Cardboard Mailer Boxes (Optional Section)
If you’re using mailer boxes, which are quicker to fold and do not require tape, follow these steps:
Step 1: Fold Front and Back Panels Inward
Begin by folding the front and rear sides of the mailer box inward. This will provide a firm foundation for your things.
Step 2: Fold Side Panels and Secure Tabs
Fold the side panels in while the front and rear panels are standing up. Tuck in any tabs to secure everything in place.
Step 3: Close the Lid by Tucking in the Ears
Finally, shut your mailer box by tucking the lid flaps (also known as ears) into it. This secures everything without using adhesive! Now you know how to simply fold custom cardboard boxes and custom mailer boxes.
Conclusion
Folding custom cardboard boxes is a valuable skill for keeping your items secure and looking good. To build strong gifts that amaze your consumers, follow these easy steps: prepare your workstation, unfold the box, secure the bottom and top flaps, and add unique touches.
Remember that a well-folded box preserves your contents while also enhancing your brand image. Whether you’re using normal or mailer boxes, understanding this method will make packing easier and more effective. So grab your resources and begin folding today for a better packaging experience.